Thinking of applying Swarovski crystals on shoes, accessories, and human skin? Today’s primer will guide you on selecting the proper adhesives for each type of surface.
Table of Contents
Glue for Swarovski Crystals
Swarovski crystals have been in use in fashion and accessories for more than a hundred years now, and it is not surprising that people are DIY-ing their way into creating their glittering fashion bonanzas at home. If you have ever wanted to do it yourself but have always felt less confident as you might do it badly, don’t worry about it anymore, because we are going to teach you how to do it like the pros.
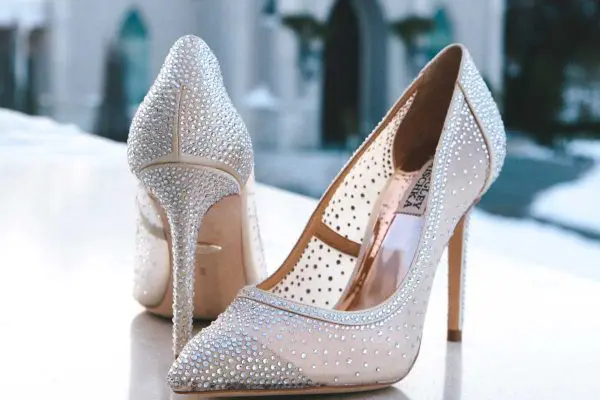
On Shoes

Adhesive glues like the E6000 Glue and the Fabri-Tac Glue
are ideal for applying rhinestones and Swarovski crystals onto any kind of footwear. The important thing here is that you have the right tools to set and apply pressure on each of the crystals that you will be using so that the crystals will adhere to the surface of the footwear.
With insufficient pressure, there is a tendency for the glue to just to stick to the lining or outer surface of the crystals, and then they fall off. If you are applying crystals to hard leather, use A and B epoxy mixtures instead. Glues like Fabri-Tac dry within seconds, while epoxies can dry within seconds but will achieve full cure in 72 hours.
RELATED POST: How to Apply Swarovski Crystals Onto Shoes?
On Nails

Gel nail polish
Applying Swarovski crystals to nails requires a slightly different method, altogether. The ideal adhesive for applying crystals to nails is UV gel. When you apply final layer of UV gel, place the flat backs crystals on your ideal position of nail. Then cure. Remember that do not apply the UV gel over the crystals as the gel will affect the crystals’ clarity. To keep shiny of the crystal, using a thin brush dips some uv gel top coat to seal the edges of crystal. You can also repeat this step in order to keep the crystal better adhesion.
Regular Nail polish
For regular nail polish, you may use cyanoacrylate with top coat of nail polish to glue the crystal. But in some instances, it may damage the foil backing and this may eventually result in warping and the crystals falling off. The application skill is mentioned at previous paragraph. After the last step of nail poish, you may air-dry your fingernails for five to ten minutes, and then soak them in water with ice to quickly harden the adhesive because of the dropped temperature of the water. Submerge your nails for at least three minutes and don’t do anything with your hands for at least one hour, or you risk accidentally snagging the crystals. If the adhesive is not yet ready, the crystals are going to fall off.
RELATED POST: How to Apply Swarovski Crystals on Nails?
On Clothing

To successfully adhere to Swarovski crystals on fabrics, it is recommended to buy Swarovski Hotfix crystals, which is coated with hot-melt glue. It will be melted when the glue is heated. When it cools, the glue will be harden and permanently fixed on the fabric. To make the glue be heated, heat press is an ideal tools as it is allowed to distribute pressure and temperature effectively and evenly, so that you can efficiently have a better result for your project.
If you do’t have such professional tools, there is an another common tool you may have at home, that is an iron, but the disadvantage of it is that the control of pressure and temperature is limited. And be noted that do not choose an iron with steam vents, it may cause negative result for your project.
Actually, there are different Swarovski crystals and different tools for application of crystals on fabric. Visit their official website for more information.
On Metal Surfaces
While people don’t stick Swarovski crystals onto walls, they do attempt to create their crystals jewelry at home with the help of some basic jewelry tools and adhesives. Swarovski crystals adhere perfectly to metal settings and jewelry pieces with pre-mixed/one part or two-part (A&B) epoxy products.
As we have mentioned earlier, the full cure for epoxy products take about 72 hours, but the epoxies will harden within thirty to sixty minutes after application.
This should give you sufficient time to correct the positioning of the Swarovski crystals and remove any gumming around the edges that may occur after pressing down on the crystals. If you have experience with drilling rhinestones, feel free to create small cavities to add extra adhesives onto each of the chatons and beads that you are working with.
On Glass Surfaces
Are you thinking of applying Swarovski crystals in a mirror? It can be done. Although mirrors have surfaces that would defy most adhesives, using the E6000 adhesive will take care of your problems instantly. Just make sure that you apply sufficient pressure so a bond will form between the crystal and the surface of the mirror.
Otherwise, the foil backing may peel and cause the crystals to fall off. You will only need to wait a few minutes before the E6000 will harden considerably. Use the extra time to remove any gumming and secure any loose crystals. It would help greatly if you can visualize and blueprint your design before you start gluing crystals in your mirror. It will help you save a lot of time in the process.
On Human Skin

Rhinestone tattoos are one of the most ambitious and delicate applications of Swarovski crystals. Skin and rhinestones look amazing and ephemeral, and it is also important that you only use adhesives that are safe to apply on the skin. This means UV gels and E6000 are completely out of the picture because they will likely ruin your skin. For skin applications, adhesives like eyelash glue are suffocated.
Theatrical spirit gum can also be used if you are covering a more extensive area, like a whole hand or arm. Swarovski crystals should never be applied near the eyes and other sensitive areas. Eyelash glue dries in seconds, but the full cure takes place after 24 hours. Theatrical spirit gum, on the other hand, requires only 30 seconds to harden fully. Take note that these lesser adhesives do not have the same strength as E6000 and all the other glues we discussed earlier.


